Approval requests (ringi)

Request, decide and record purchases, contracts and travel

Submit a request with type, details, amount and attachments such as quotes, and approvers are emailed. Decisions are recorded with notes and easy to find later.

Who uses it:ManagersStaff
What it does

Simple requests

Type, details, optional amount, attachments and one or more approvers.

Approve by email

Decide from the email link without signing in.

On the record

Who decided what and when, with notes.

How it flows

  1. 1Staff
    Submit

    Save a draft first if you like.

  2. 2Automatic
    Approvers notified

    By email, menu count and 🔔.

  3. 3Office
    Decide

    With a note; the requester is emailed.

On phones & in the app

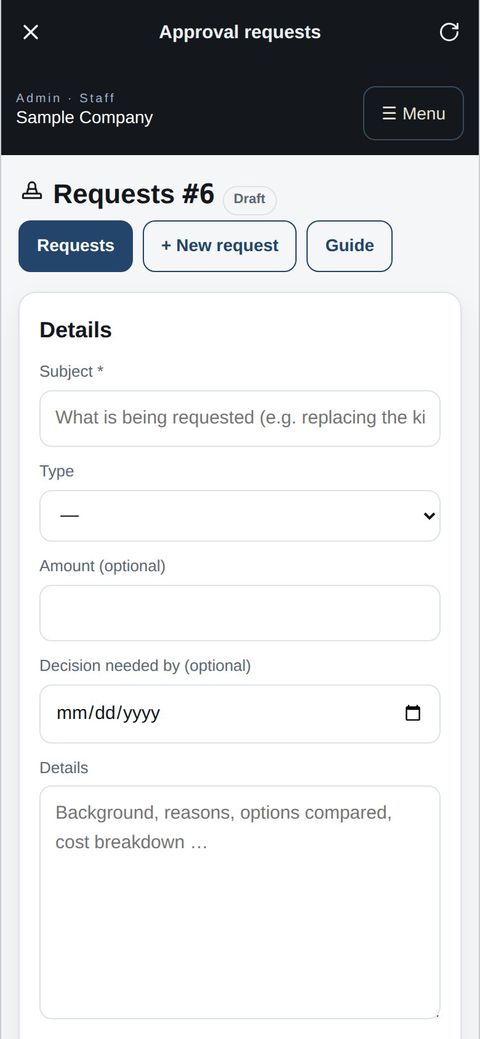
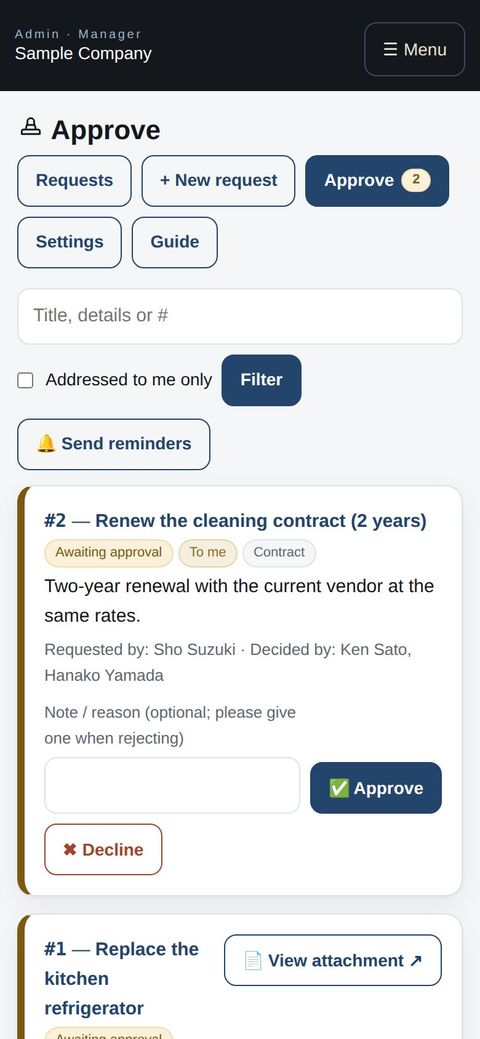
Submit requests from the work apps in the app. Approvers read the details and attachments on a phone and approve or decline.

Staff: writing a request in the app
AppStaff: writing a request in the app
Manager: approving on a phone
Phone browserManager: approving on a phone

See the screens

Admin (office)

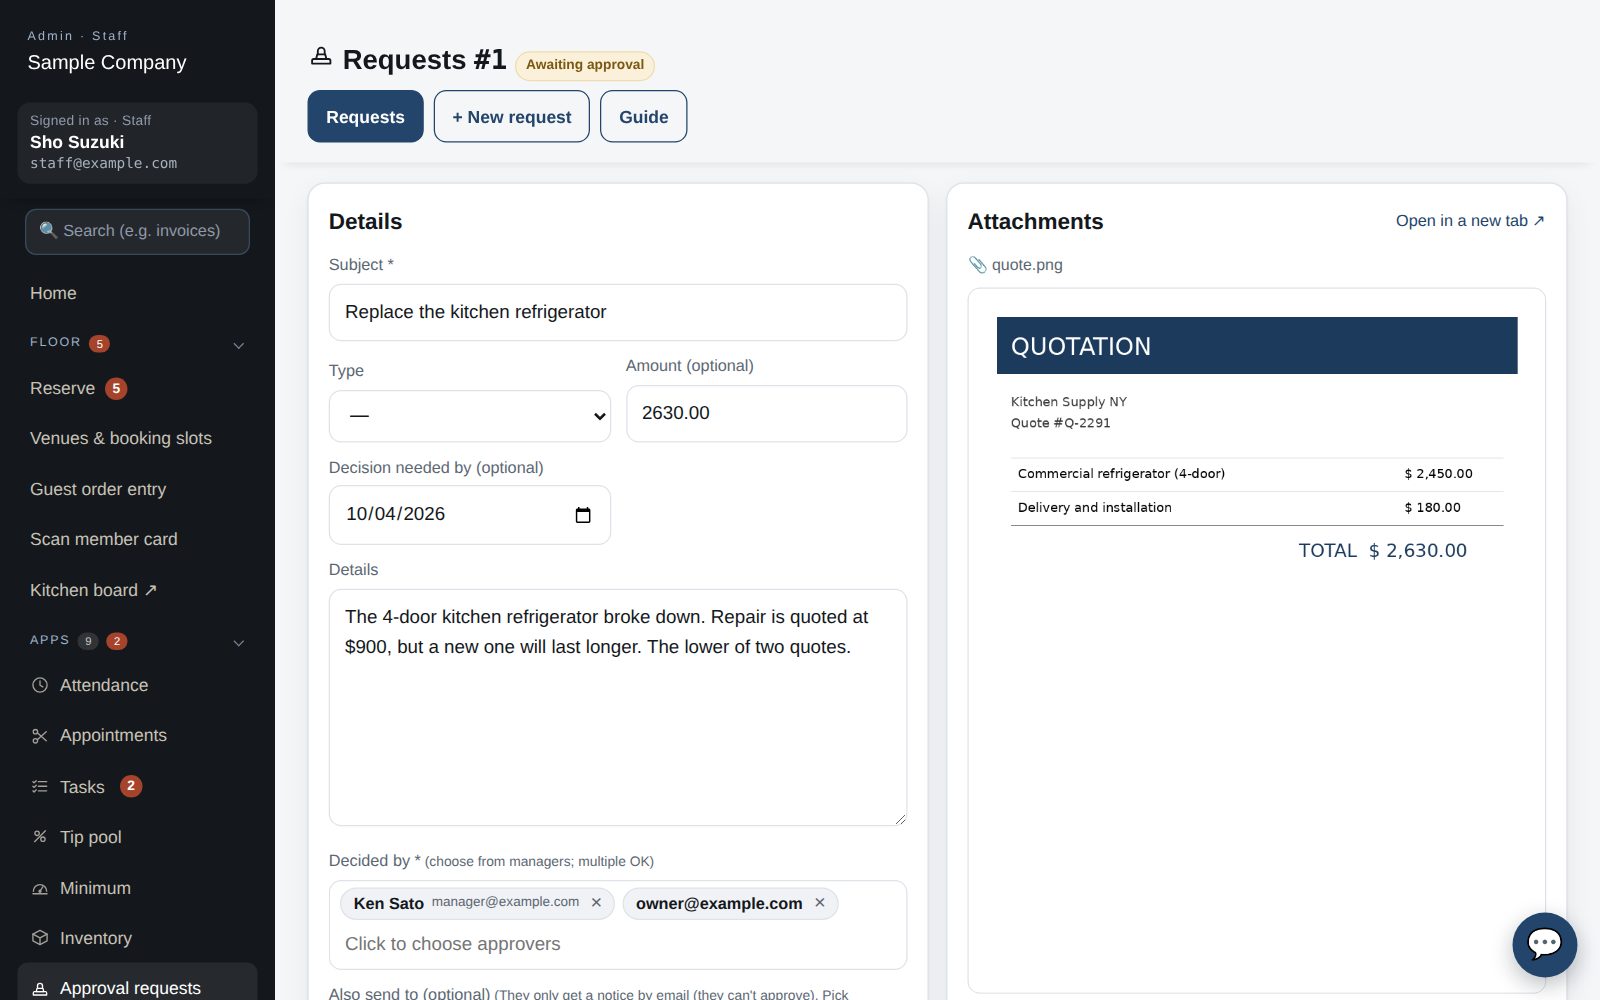
New request: title, details and approvers, then submit

Submit a request

  1. Under Apps → Approval requests → New request, enter the title, type (purchase, contract, travel …), details, amount (if any), an optional attachment (a quote, say) and approvers (managers and up, multiple OK).
  2. “Submit” makes it pending and emails the approvers (with a no-sign-in review link valid for 7 days). Use “Save as draft” to finish later.
  3. You can edit your own request until it is decided. Click a number (#) in the list to open it.
  4. Add as many links (product pages, quotes, shared folders …) as you like with “+ Add a link”, and as many attachments as needed (20 MB each; you can add or remove them later).
  5. If the company has set an approval route, you don't pick approvers: the request goes through the route one person at a time (shown at the top with the current step). Your own approval step is skipped.
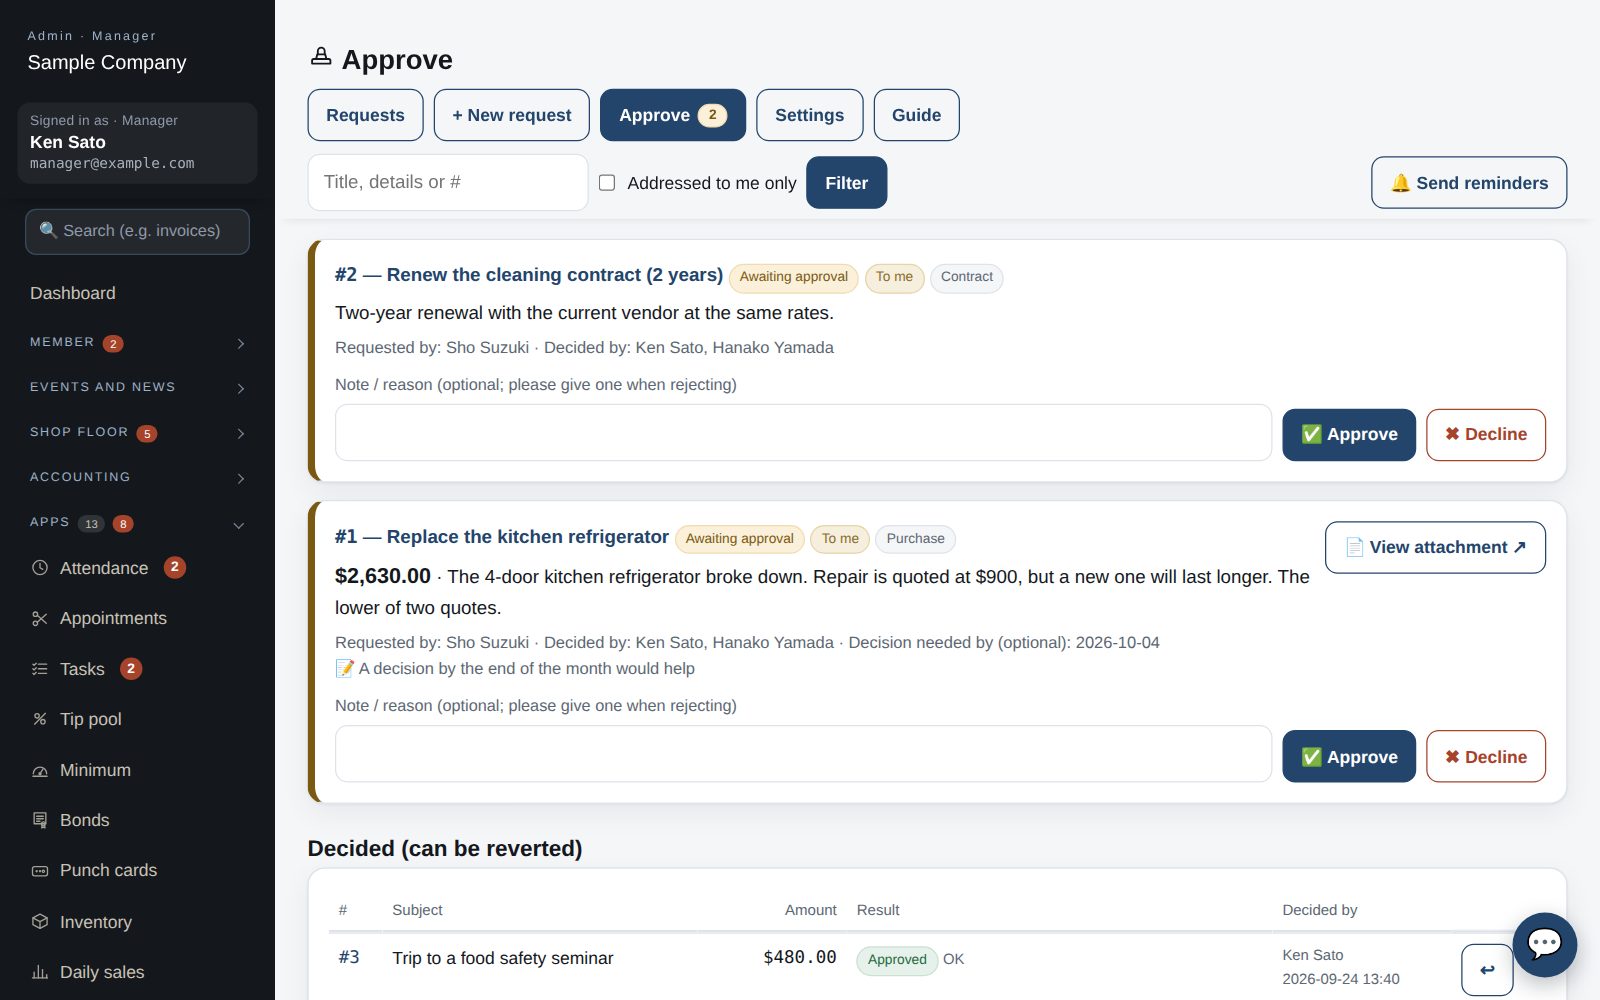
Approvals; items addressed to you have an orange bar

Approve or reject

  1. Pending requests appear under “Approvals”. Check the details and attachment, add a note (a reason when rejecting) and press Approve / Reject. The submitter is emailed.
  2. Only the listed approvers can decide; owners may act on anyone's behalf. Approvers can also decide from the email link. Use “Decided” → ↩ to revert a mistake.
  3. With an approval route, only the current step's person can act. Each approval emails the next person. A “process” step (e.g. the Purchaser) presses “Mark as done” once the purchase, reimbursement or check is done, or sends it back with a reason. The submitter is notified when the last step is done.
  4. Decisions are logged and the list can be filtered by Approved / Rejected.
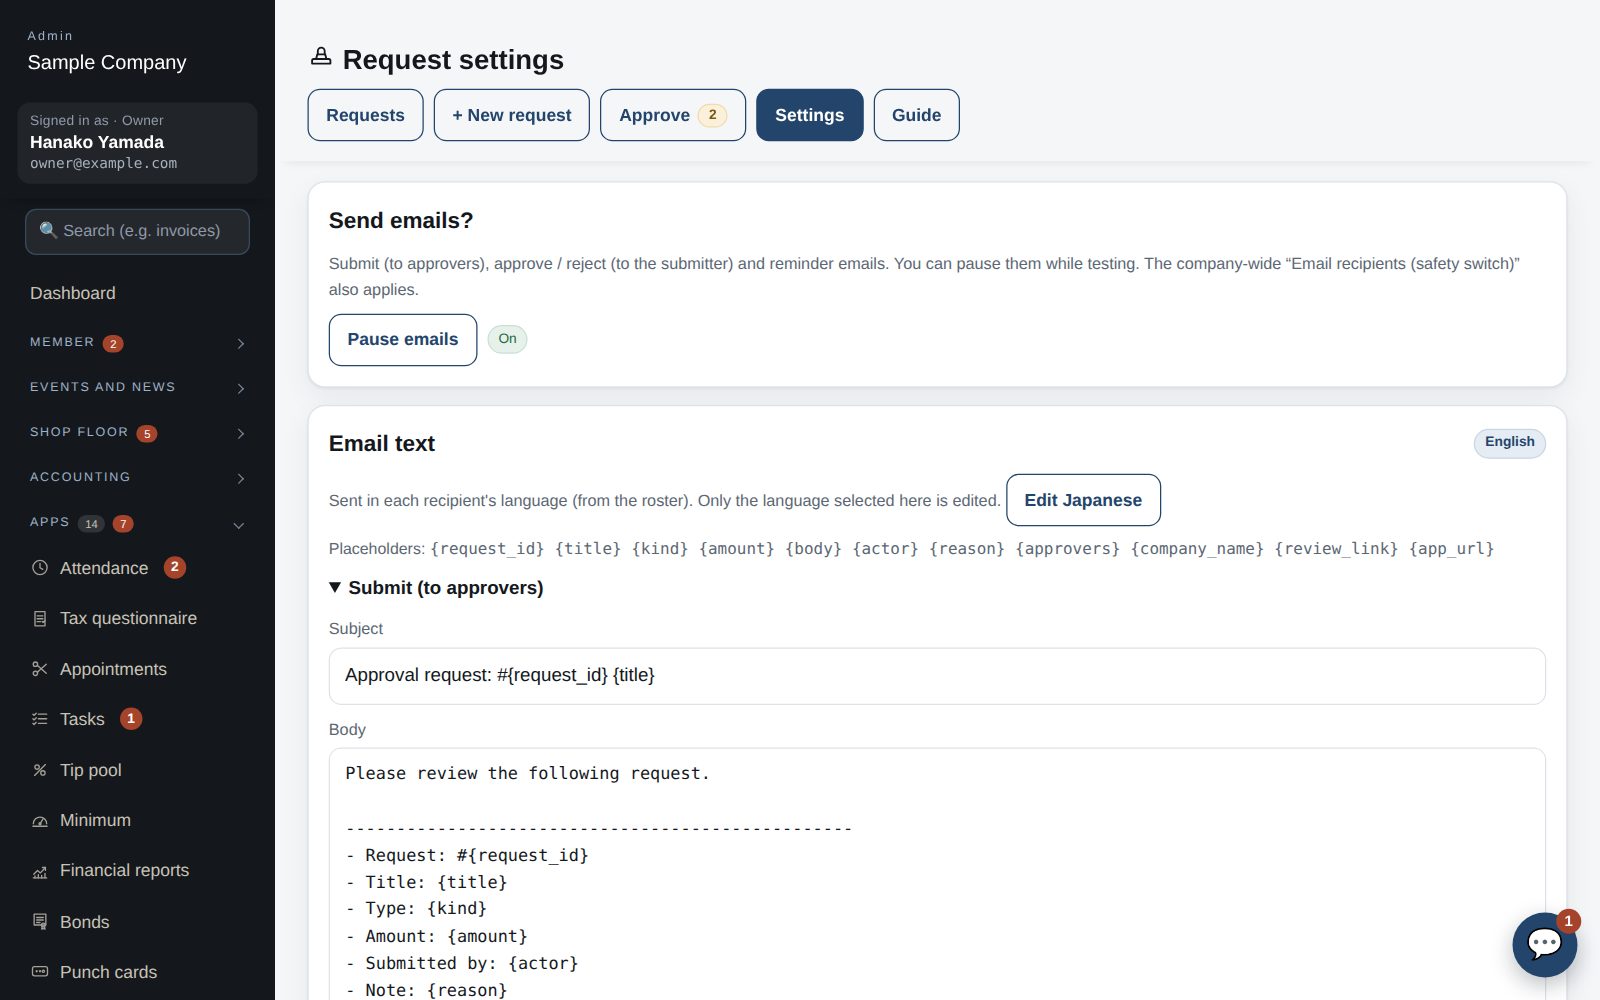
Request settings: pausing emails and editing templates

Settings

  1. “Pause emails” stops submit / approve / reject / reminder emails for this company only. The company-wide “Email recipients (safety switch)” also applies.
  2. Automatic reminders: when a request is stuck waiting for approval or processing, the person at the current step gets a reminder email (with a no-sign-in approval link). By default the first goes out after 2 days, then every morning until it's decided. You can change the timing or choose “Don't send”. Each reminder is recorded in the request's History.
  3. Email templates are edited per language and sent in each recipient's language.
  4. Approval route: list the steps from the top — name (e.g. Approver 1), person and action (approve / process). Clear it to go back to choosing approvers per request.
  5. Request types: one per line (Japanese | English), e.g. purchase request, expense reimbursement, post-purchase report.
  6. Danger zone (owner only): deletes every request, template and attachment. Type DELETE to run.

Works well with

Start with just the features you need. If nothing fits the way you work, we'll build it for you — free.

Get started →Try the sample company →🎁 Get a custom app, free